
Building A Text-Based Chemical Structure Rendering Tool With And For Claude
Published:
Introduction
In this post I explore (a) building a text-based chemical structure rendering tool for Claude and (b) using Claude Code as a development tool for a simple cheminformatics project. The result is chemscii, a Python package that renders molecular structures as ASCII/Unicode art.
Project Scope
The main technical challenge is that molecular graph structures exist in continuous 2D space, but terminals are discrete grids. We need to map floating-point coordinates to character positions while preserving the graph.
Key requirements:
- Multiple input formats: SMILES strings, IUPAC names, ChEMBL IDs
- 2D coordinate generation: Use RDKit to compute molecular layouts
- Text-based rendering: Map bonds and atoms to terminal characters
- CLI interface: Make it easy to use from the command line
- Claude Code integration: Enable use as a custom tool within Claude
Development Approach
In this section I highlight the approach I took to package development with Claude Code.
Step 1: Setting Ground Rules
First, I wrote a CLAUDE.md file to give persistent context and general development guidelines.
# chemscii development

## general guidelines

It is IMPORTANT to NOT DEVIATE from these principles:
1. YOU MUST use conda for virtual environment management
2. YOU MUST use poetry for python dependency management
3. YOU MUST write unit tests for all modules
4. YOU MUST use CI/CD (GitHub Actions) with pytest (unit testing), ruff (linting), and mypy (type checking)
5. YOU MUST use type hints for all code
6. YOU MUST otherwise follow google code and docstring conventions
7. YOU MUST write code that is minimal, simple, reusable, and easy to understand

## project scope

YOU MUST focus entirely on building a python package for rendering chemical structures as ASCII/Unicode art.
Step 2: Defining Initial Structure
I asked Claude to generate a preliminary project tree structure, which I edited. Then I asked Claude to generate initial python module stubs and edited them to match my desired schema. The tree structure was something like the following:
chemscii/
├── src/
│   └── chemscii/
│       ├── __init__.py
│       ├── parsers/         # Input format parsers
│       │   ├── __init__.py
│       │   ├── molecule.py  # SMILES and SDF formats
│       │   ├── name.py      # Molecule name to SMILES
│       │   └── chembl.py    # ChEMBL ID to SMILES
│       ├── layout/          # 2D coordinate generation
│       │   ├── __init__.py
│       │   ├── atoms.py     # Atoms
│       │   └── bonds.py     # Bonds
│       ├── renderers/       # Text rendering engines
│       │   ├── __init__.py
│       │   ├── base.py      # Base renderer
│       │   ├── ascii.py     # Basic ASCII renderer
│       │   └── unicode.py   # Basic Unicode renderer
|       ├── cli.py           # Command-line interface built with rich
│       └── mcp.py           # Model context protocol for tool calls
├── tests/
│   ├── __init__.py
│   ├── test_parsers.py
│   ├── test_layout.py
│   ├── test_renderers.py
│   └── fixtures/            # Test molecule SMILES and SDF
└── examples/
    └── basic_usage.ipynb
Step 3: Infrastructure
Next, I asked Claude to generate the package conda environment.yml, poetry pyproject.toml, installation instructions, initial test fixtures, precommit hooks, and CI/CD (GitHub Actions). I was specific about the desired dependencies and workflow, so the resulting infrastructure only needed minor modifications. Having the infrastructure in place ended up making the development process pretty smooth. The linters and type checking acted as guard rails.
Step 4: Generation
With the foundation in place, I proceeded to ask claude to generate the modules and inspected / edited the generated code. Following this approach the initial chemscii command line tool was quickly developed.
CLI Example:
chemscii colchicine
                                      O
                               C--  ==
                                  -C
                                   |
                                   |
                                   |
                                   N
                            /C    /
                           /  \\ /
                         C/     C
                         |      |
                        |       |
                        |        |
                    C===C        C===C
             C      |    \      /     \
              \     |     \     /     \  ==O
              \    |       C---C       C=
               O---C      =    =       |
                    =     =     =      |
                    =  --C      C     =C
                     C-   \      \\  =  \    C
                     |     \       C=    \ //
                    |       O             O
                    |       /
                C---O      /
                          /
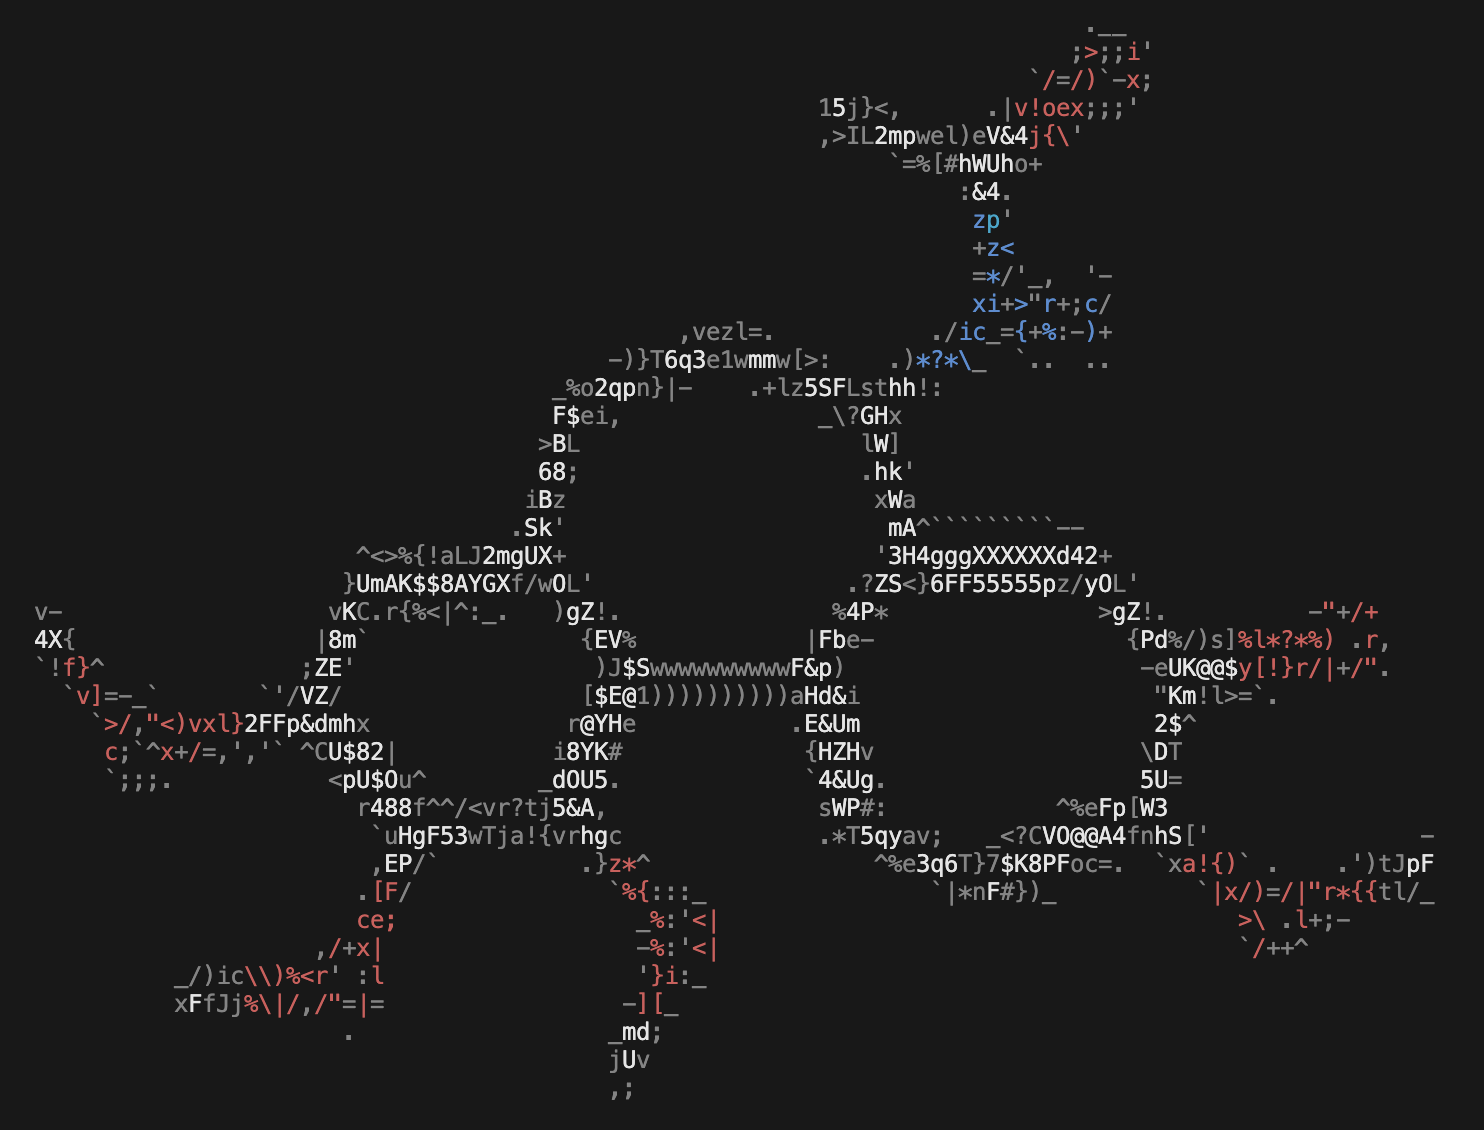
With a little debugging the initial prototype worked. But to be honest, when I first saw this rendering, I lol’d because it looked so comically bad (albeit chemically clear enough to understand).
Claude Code handled RDKit reasonably well. It knew to use AllChem.Compute2DCoords() for layout and understood molecular graph traversal. However, the initial result needed some polishing. So I added options to make sure structures were Kekulized, set preferred coordinates, and use ring templates to improve the chemical structure rendering. In addition, seeing the limitations of the initial approach I manually added an image to ASCII rendering approach using ascii-magic to improve the general aesthetics .
CLI Example:
chemscii colchicine
Claude Code Integration
The next step was to explore Claude Code integrations. I started by testing the simple CLAUDE.md approach. Claude Code automatically reads CLAUDE.md files in your project directory. These files provide context and instructions that guide Claude’s behavior when working in that directory. The example file and more detailed instructions can be found in the chemscii repository.
This approach is the simplest: anyone who installs chemscii and copies CLAUDE.md can immediately use the integration with zero configuration. However, it is limited because it is directory scoped and Claude does not have direct access the CLI parameters. In addition, if we wanted to configure multiple tools it may become cumbersome to specify and manage them in a single markdown file.
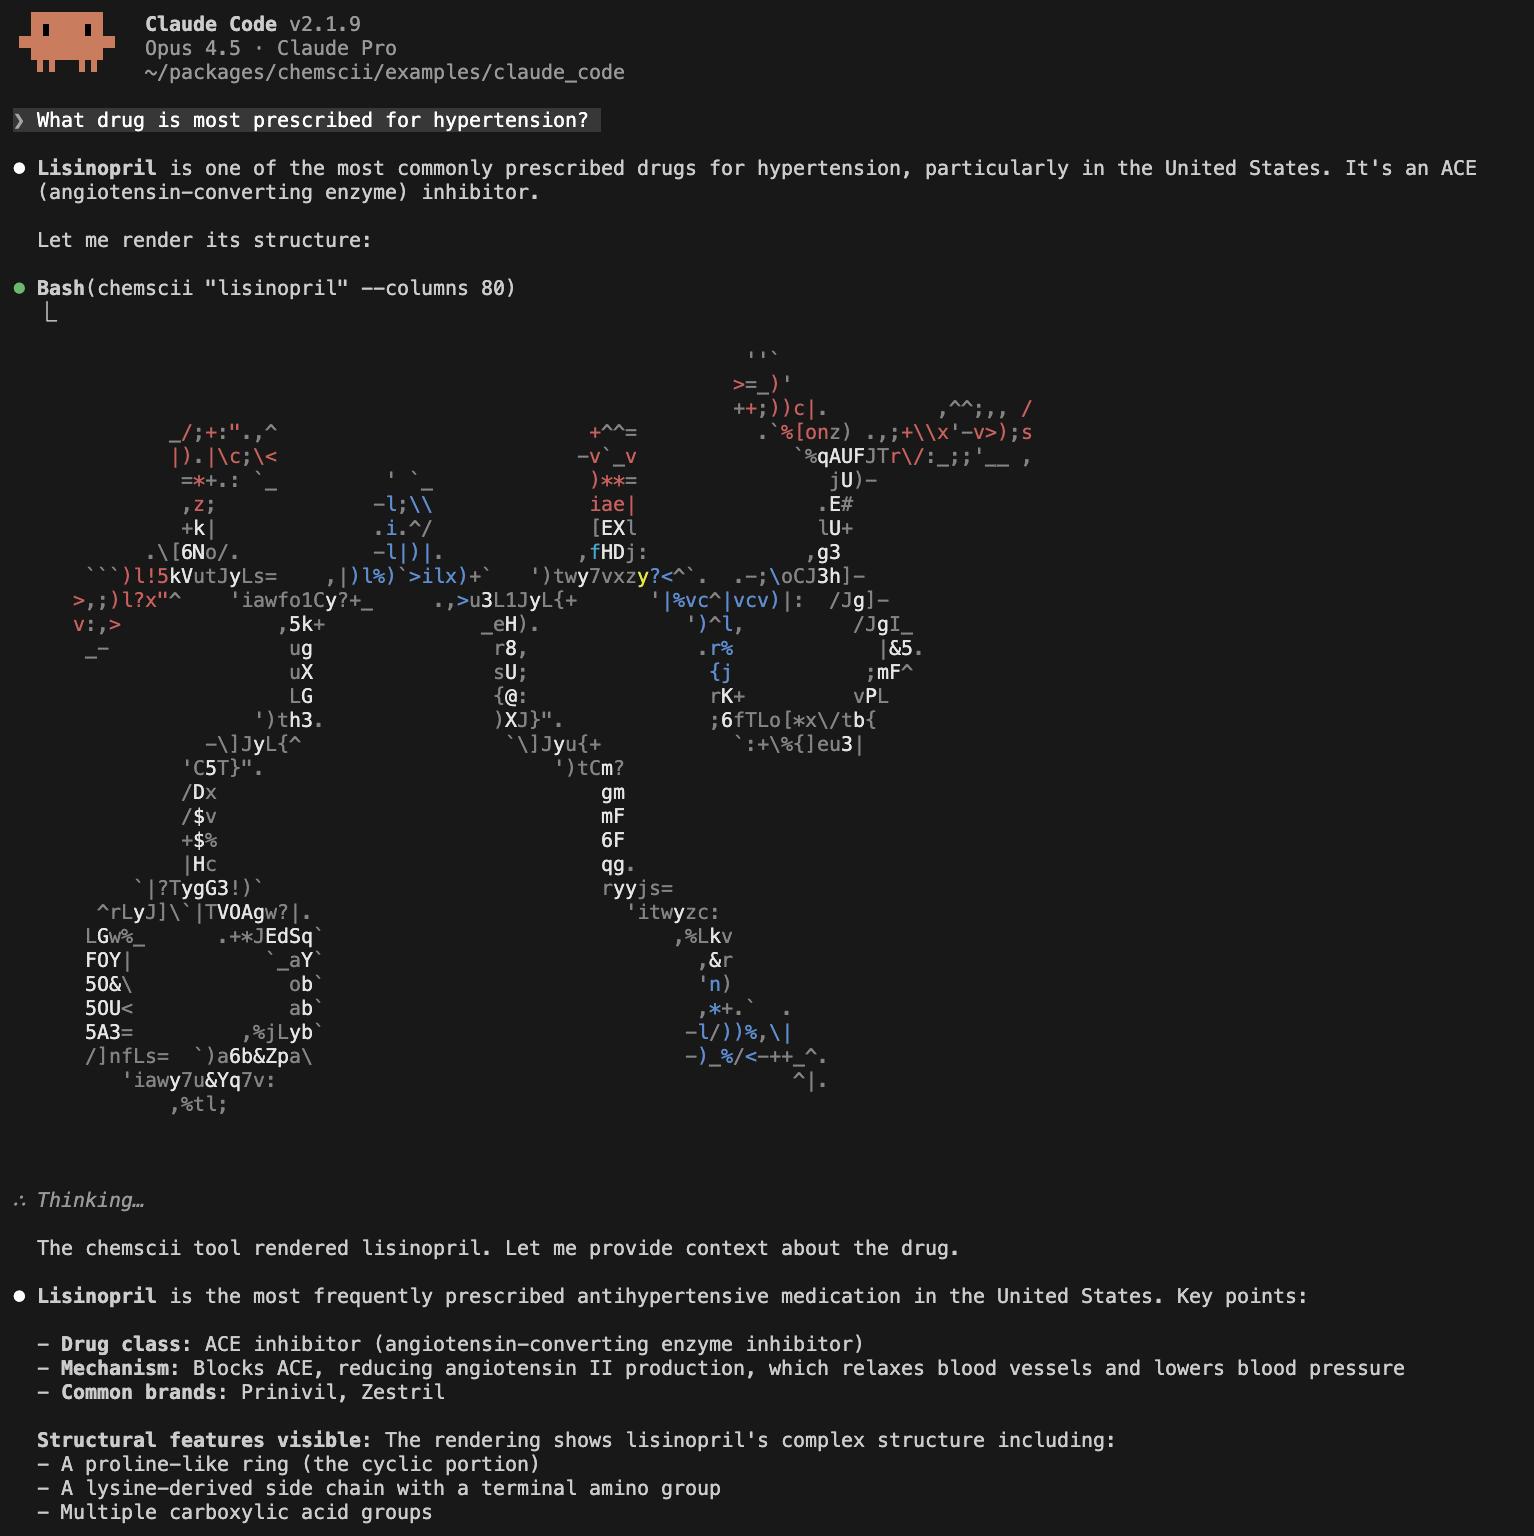
Claude also supports model context protocol (MCP) servers. To build a chemscii MCP server the mcp package was used to configure a FastMCP server that exposes a render_molecule tool that Claude can call to render chemical structures without needing CLI instructions. Unlike the CLAUDE.md approach, MCP integration works globally (not directory-scoped), provides a structured tool interface (e.g., allows us to manage tools via the claude CLI or by editing ~/.claude.json), and gives Claude direct access to rendering parameters. To streamline integration, I added a --mcp argument to the chemscii CLI. Now by installing chemscii and adding the mcp to claude you can have text-based chemical structure rendering in Claude Code.
pip install chemscii
claude mcp add chemscii -- chemscii --mcp
For detailed installation and usage instructions see the example.
Conclusion
Key learnings from this project:
- For a weekend project, Claude Code accelerated development significantly. I spent more time designing and less time typing.
- Having unit tests, pre-commit hooks, and CI/CD configured first allowed pretty clean development. The initial prototype didn’t work but could be quickly debugged and improved.
- The current stdio-based MCP integration in Claude provides limited support for rendering ANSI color codes. Unfortunately at the moment this means the
chemsciiMCP server does not provide the same color rendering as the CLI.
Check out chemscii on GitHub or install with pip install chemscii.


